Get Started Podcasting with both Audio & Video...
So you’d like to dive right into podcasting? Excellent. Here’s the absolute necessary steps you’ll need to take in order to get going with your first podcast. Note: this is the bare minimum to begin and focuses heavily on the technical aspects in a truncated form. In order to become truly successful, check out the various guides on my website or request a consultation session and I can help you further. Happy trails.
Concept and Development
You’ve got a spark – an idea that you want to broadcast out to the world. Podcasts allow you to do that. But we don’t recommend blabbing into a mic hoping it sticks. You’re welcome to do that to practice, but not if you want serious traction. The ultimate goal for podcasters who want to be successful is to make a podcast that is findable, accessible and shareable. To do this properly you’ve got to develop your concept.
The following steps force you to really think and put pen to paper so the initial concept grows into a well produced show.
Research: This can mean a lot of things. It can mean researching the marketplace and competition. It can be learning the proper steps (which this website falls into). Regardless of how you define research, it’s meant to educate you more so you can better prepare yourself for the venture.
Target audience: Who are you creating this podcast for? Don’t cast the net out too wide. There’s lots of case studies out there highlighting the power of niche audiences. Take advantage of it and speak to them directly. The more niche something is, the more likely that audience is underserved. If you’re worried a niche audience will be to small and therefore insignificant then don’t be. Instead, read Kevin Kelly’s 1,000 True Fans principle.
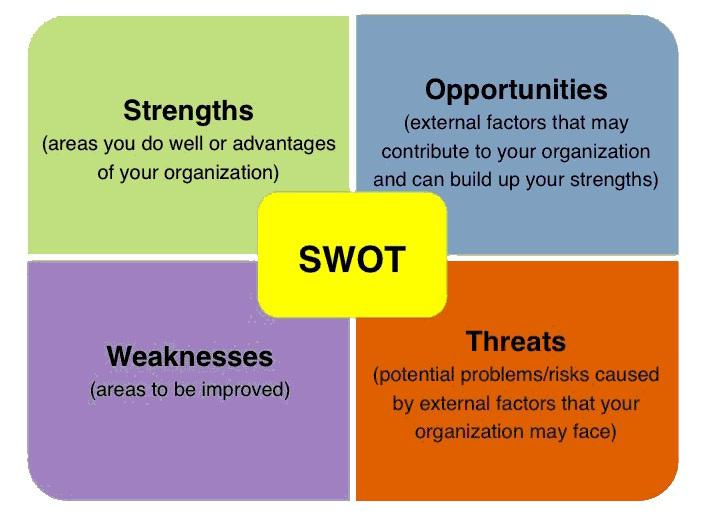
SWOT analysis: This stands for Strengths, Weaknesses, Opportunities and Threats and is primarily used in business sectors. However, it’s a good exercise to partake in to understand how viable your idea is. If you’re going to do a podcast as a creative hobby then this isn’t necessary. But if you’re looking to make a splash or are a brand seeking to use podcasting as a means to maintain and grow your customer base then this is a must. For details on how to conduct a SWOT analysis check out this article from Mind Tools that explains it well.
Assets
Assets are the parts of your podcast that you need, whether integrated as part of the show or in order to post and distribute it online. This includes writing out a series description (which you’ll use for your website, Apple Podcasts, etc), creating graphic artworks (primarily logos) and any voice overs, intros and outros, themes and sound drops played during your show.
If you need help with logo design, 99designs.com is a great site to utilize because you can either hire a talented designer or start a design contest where artists submit their concepts to you and you select which you like best. If you don’t want to hire a designer to make your logo, you can create your own using the site Pixlr, a web-based photo editor that gives you powerful Photoshop-like editing tools as well as stock images to create your own logo design. Pixlr has both a free version and a low-cost pro version.
No matter which path you take, know that Apple requires your podcast logo to be a certain size and file type. Your artwork’s size should be between a minimum of 1400 x 1400 pixels and a maximum of 3000 x 3000 pixels. The image should be 72 DPI (which determines how clear the image is when blown up), and in JPEG or PNG file format. Apple also recommends using compressed image files for your logo so they show better on smartphones. Refer to Apple’s help page for the full requirements for podcast logos..
To create your show’s other production assets like an intro, outro, or music tracks,check out UpWork. It’s a website for freelancers of all skills, including production work such as this.
Another resource to check out is Fiverr. Like UpWork, you can find freelancers who can help you make production assets like intros, music, or editing help for your show. Some freelancers specialize in making podcast logos or voiceover intros, so you can take a look at their past work to find someone whose style will work for your show.
Equipment
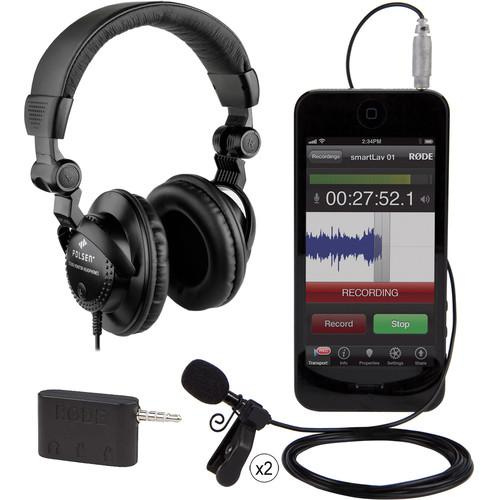
Podcasts by definition can be strictly audio or audio AND video. To get you started this section covers the simplest (and cheapest) of methods to get you going in both. First, go to the B&H website and purchase the Rode smartLav+ Two Person Lavalier Interviewer Kit. It’s marketed for iOS devices but works for Android devices as well.
The benefit with this particular microphone is that it’s small and very easy to travel with. If you travel a lot and still want to stick to your podcast recording schedule, or if you’re getting sound from an interview with someone else for your show, it’s easy to pack and use on the go.
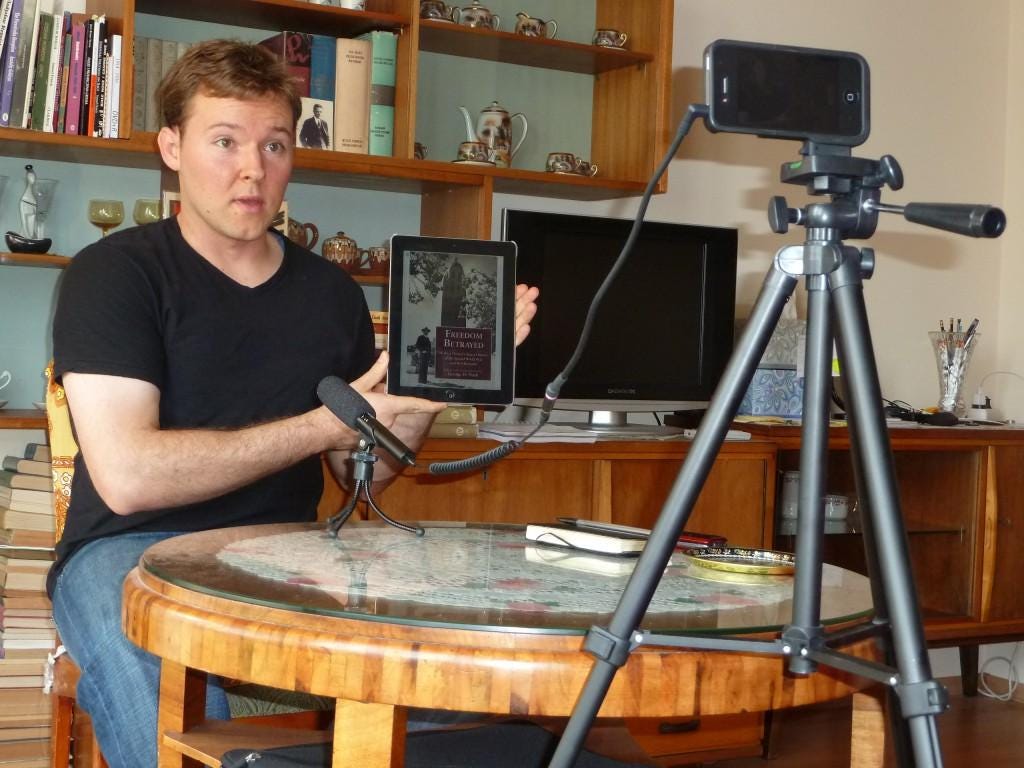
The Rode smarLav+ is also a minimal investment that will get you going easily as it works both to record audio ONLY versions (using the Rode Rec app) and video podcasts. To record video, all you have to do is plug the device in as if you were using it to record audio only and then launch your video recording app on your smartphone or tablet. The setup would look something similar to the below picture.
Now, you might have noticed in the picture the iPhone is on a tripod. You’ll need to get one if you don’t have anyone holding the smartphone and recording you (which is not recommended). For smartphones, check out this link. For tablets, click here instead.
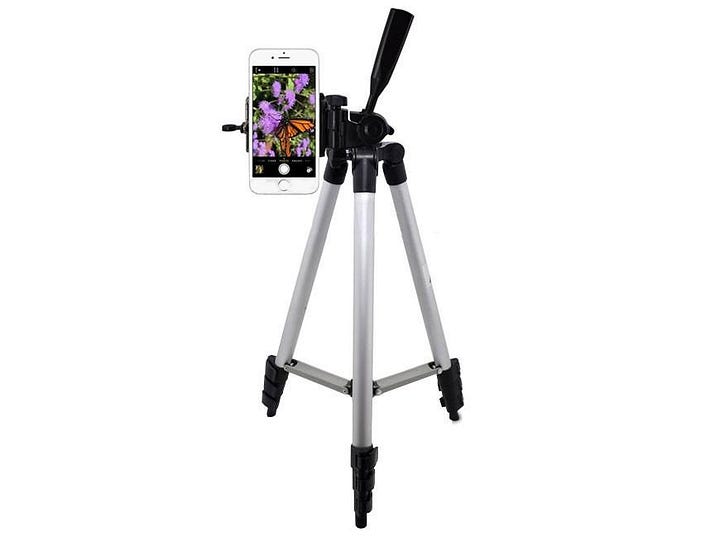
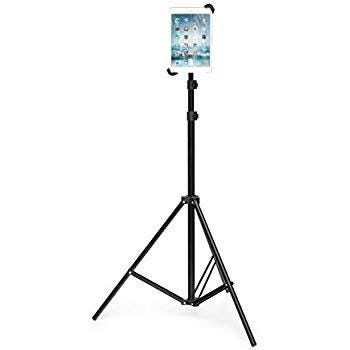
Get these and try them out. The more comfortable you feel with the equipment the better your podcast will become.
Something to note – this setup is limited to 2 people within the same location. For more advanced setups, check out the guides provided on this website.
Recording Your Podcast
Using your Rode smartLav+ microphone and the Rode Rec app, it’s time to record your podcast.
First, you need to attach the microphone to your shirt so that it stays in place and doesn’t create “handling noise.” This is sound that the microphone picks up when it has physical contact with your hand or another surface. Rode has an excellent video here on how to properly attach a lavalier microphone to a shirt to avoid handling noise. The relevant part starts at (0:22), but the main takeaway is that you should secure the microphone to your shirt by using your kit’s microphone clips, and to loop the microphone’s cable through the clip for stability and to reduce stress on the cable
When recording, you want to be set up your space so as to reduce echo and background noise. Find a smaller bedroom or office space that doesn’t have a lot of hard surfaces – couches and other soft furniture can help reduce the chance that your microphone will pick up echo. Shut any open windows and doors, and turn off your A/C unit or fan if they’re running. Be aware that if you can hear anyone else in your home from your recording space, there’s a good chance it will be picked up by your microphone, so you’ll want to reduce the possibility of loud noises as much as you can.
If your podcast is a video and audio podcast, you’ll need to consider the lighting of your room. Aim to have multiple light sources that illuminate you and your space. Daytime recording is the easiest. Having a window off to one side that provide indirect sunlight will provide a natural light that brightens your space and serves as your “key light”. You can also purchase an inexpensive light source to place behind your smartphone as a “fill light”. Check out this step by step vlogger’s guide for a breakdown of how to set up your video lighting.
Once you’ve attached your microphone and set up your recording space, open up the Rode Rec app and do a test recording. Record for at least 30 seconds, talking into the microphone and then not speaking at all. You should play it back and listen to how well the smartLav+ picks up your voice – you should aim to have the green bar at the top of the screen fill to about 75% while you’re speaking.
You should also listen for how the room sounds when you’re not speaking. This is called “room tone,” and it’s important that you remove as much background noise as possible before recording your podcast. A/C units, fans, fridges and other appliances, and open windows are common offenders that can increase the amount of background noise in your room.
While recording, be sure to wear your headphones as you record. Speak clearly into your mic. If you misspeak or use a wrong word, stop and wait a second before beginning the sentence again. Occasionally glance at your Rode Rec app to ensure you’re still recording and that your levels (the green bar) are hitting between 50% and 75% of the full bar. When you’re done with your podcast but before stopping the recording, sit in silence for 30 seconds to record the room tone. These steps will make your editing process much easier.
Editing Your Podcast
Once you’ve recorded your podcast, it’s time to edit it. You’ll want to edit your podcast down to remove mistakes, like misspoken phrases or loud background noises, or to remove segments that are less interesting or off topic.
Editing a podcast requires audio editing software. First, you should upload your audio (or audio and video files) from your smartphone to your computer.
If your podcast is only audio, you can download and use the free, open-source program Audacity.
In Audacity, you need to import your podcast’s audio to begin editing it (File > Import > Audio). The most useful tools in Audacity are the playback buttons at the top left and the six buttons in the middle. These six buttons allow you to trim audio for mistakes or unwanted content, split and combine audio clips, fade audio in and out, and correct sounds.
Before you begin editing your audio, be sure to import the file and immediately export it again using File > Export Audio and rename the file. You want to do this because Audacity uses a process called “destructive editing.”This means that any changes you make to your audio in Audacity reflect changes to the actual podcast audio file. To preserve your original audio, export the file at the start as a WAV and rename it to something like “Podcast #1 Raw Audio”. Now you have an alternative version of your original audio while you edit your podcast into its final version.
When you edit out mistakes in your audio, be sure to fill in gaps by copying and pasting in clips of your room tone recording. This ensures a consistent background sound to your podcast, and listeners won’t notice abrupt cuts in the audio where you’ve made edits.
Beyond editing your podcast to remove “ums,” “uhs,” and parts of the conversation that didn’t go anywhere, you need to edit your podcast so that it has a consistent volume. There are a few steps you should take to accomplish this. First, you should add a “compressor” in Audacity to your audio. Compression in audio editing reduces your recording’s louder sounds so they’re closer in range to the average volume of your podcast. To enable the compressor in Audacity, highlight your audio track by clicking on it and then go to the menu Effects > Compressor.
Set the compressor to the following settings: Threshold: -18 dB, Noise Floor: -80 dB, Ratio: 3:1 , Attack: 0.10 Seconds, Release: 1.0 Second.
Based on how loud your audio recording was, you’ll need to adjust the Threshold up or down by a couple of dB. If your compressed audio sounds muffled after you’ve set the compressor, then open up the settings again and raise the Threshold to around -15dB. However, if you hear no difference and you still have noticeably loud parts of your audio, lower it to -20 dB or below. This setting takes some trial and error to get right.
Second, once your audio is edited and compressed, you need to normalize it for loudness. This ensures that anyone listening to your podcast on their smartphone will hear a consistent sound, and won’t need to use their volume control to adjust for the podcast’s quieter and louder moments. To do this, highlight your entire podcast’s audio track and go to Effects > Normalize. Set the “Normalize maximum amplitude” to -16 dB and hit OK.
When you’re finished editing, compressing, and normalizing your podcast, you’ll again use the File > Export Audio function to get a final file. Choose “MP3” in the bottom drop down menu, and then hit “Options”. Select “Constant” for your Bit Rate, 96 kbps Quality, and Joint Stereo. If you have a lot of music effects in your show, you can choose 128 kbps Quality, but your podcast files will be larger as a result.
Video Podcast Editing
If your podcast is audio AND video, you’ll need to use iMovie to edit your podcast instead of Audacity. Download iMovie if your Mac doesn’t have it installed already. Open iMovie and go to the “Media” section, and import your podcast audio and video files from your computer.
Here you can import your podcast’s video and audio files. Then proceed to the “Projects” tab, click the + button, and select “Movies” to create a new video project
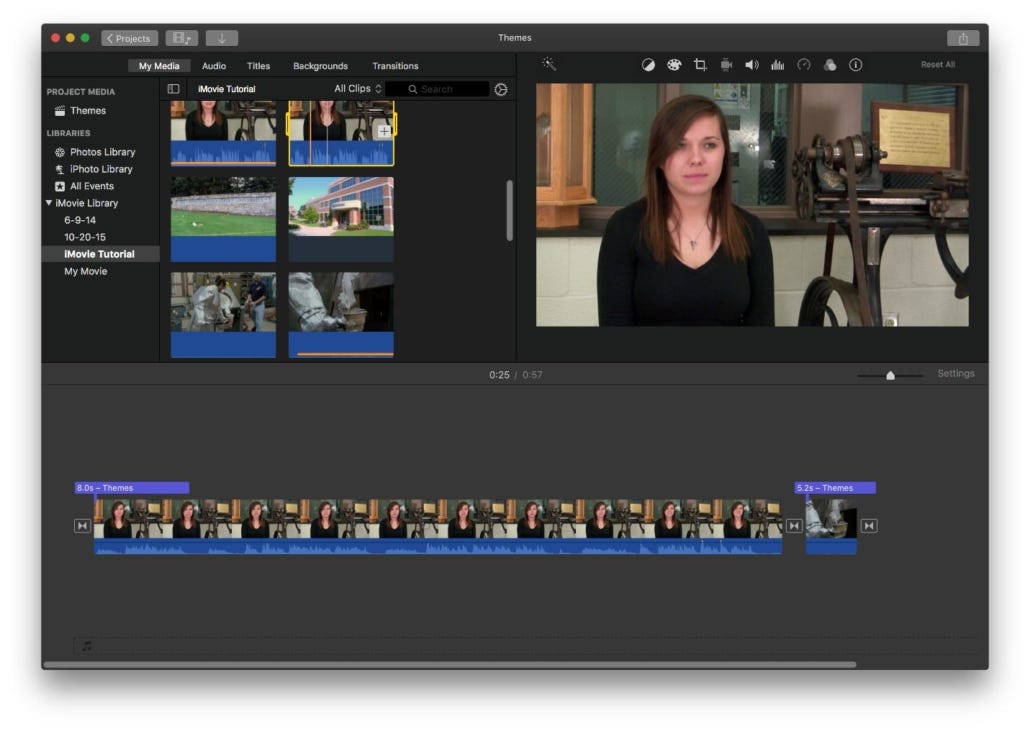
To import your video and audio files into the project, look at the “My Media” tab. You can then drag and drop the files into the storyboard view on the bottom half of the screen. Place your podcast audio on the very bottom track of the player and your video track in the center. Before you begin editing your podcast, align the audio and video so that your voice and your video image are in sync with one another.
Just like with Audacity, you can cut, move, and stitch together different segments of your video and audio tracks to edit for mistakes and unwanted content.
One trick is to overlay a second video clip on top of your podcast’s video. This is called adding a “b-roll” clip. In this setup, the primary, middle track of the production area (like the one in the above photo) is your “a-roll”, your video of your podcast. You can then add a second video clip into your “My Media” tab and drag it onto your production area, placing it on the track above your primary a-roll clip. Align the two clips so that the a-roll clip’s audio plays in sync in the background of the b-roll clip.
Adding a b-roll clip has a number of uses. It can help you cover cuts in your podcast’s video that you’ve made to remove mistakes or other unwanted content.
B-roll clips can also enhance your podcast’s content. If you’re explaining a particularly complex topic in your podcast, like how to perfect a golf swing or how to change a car part, taking video of the example and overlaying your podcast explanation can provide a more meaningful and straightforward experience for viewers.
Once you’re happy with the look and sound of your video podcast, render your final project with the Share button in the top right corner of the screen and select “File”. Choose your video’s resolution and quality, then save it to your computer.
Uploading Your Podcast to SoundCloud
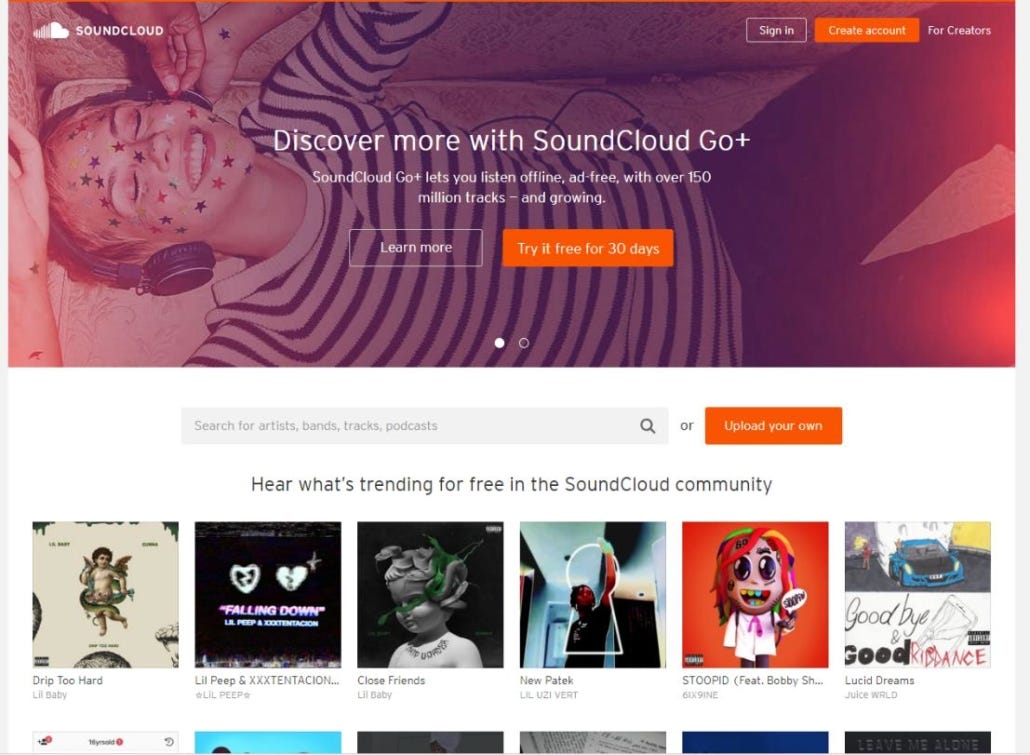
Once your podcast is edited, you’ll need to upload it to the Internet so others can find and listen to it. We’ll talk about two options today. There are a number of “hosting” services that do this for you, the simplest of which is the music and audio platform SoundCloud. It’s free, has a large user base, and has an intuitive interface for uploading podcasts.
Other services that can host your podcast include Libsyn, Blubrry, YouTube, Podbean, Simplecast and Squarespace. All of these services (except for YouTube) require a paid subscription, but as you grow your show, you may find they offer a better user experience with more customization features. For now, SoundCloud is sufficient for getting your podcast out into the world.
First, go to Soundcloud and sign up for an account.
Once you have an account, click “Upload” in the top right-hand corner. On the next page, drag your audio file into the center box. Once it’s uploaded to SoundCloud, you need to fill in the fields under the “Basic Info” tab. Include the podcast episode’s title and genre (select from the “Audio” section at the bottom of the list).
Under “tags”, include a few keywords associated with the topics you cover in your podcast. If you’re unsure what to include, as yourself “what would someone search for on Google to find this podcast?” Include a brief description of your episode, being sure to mention the topics covered and any relevant links to other content you mention during the show. On the left side, click on the square to upload your podcast’s logo.
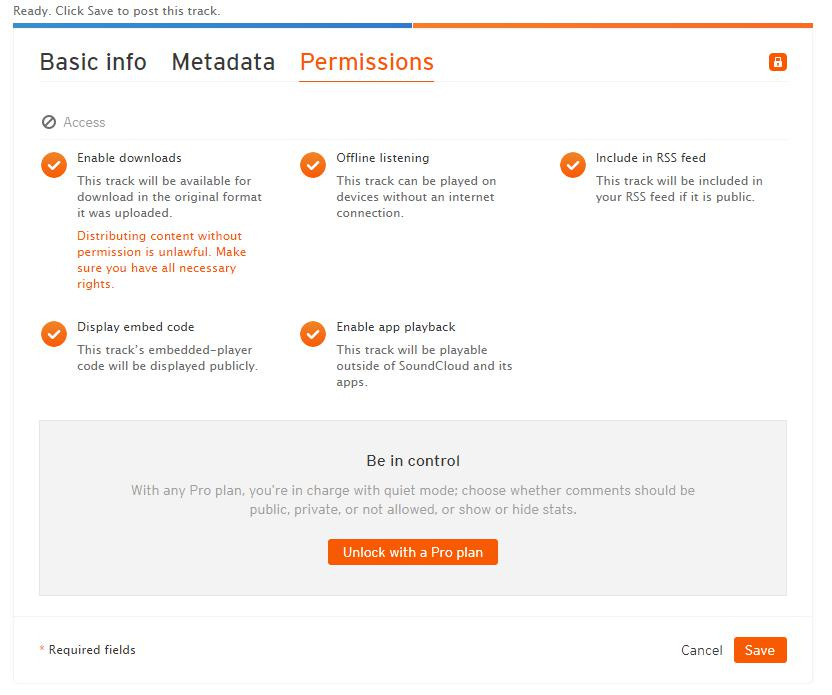
Go to the “Permissions” section and “enable downloads.” This allows listeners to download a local audio file of your podcast to their own computer. Then check the “include in your RSS feed” option. You must choose to include each podcast file to this RSS feed when you upload new episodes. Click Save on the first page and you’ve finished uploading your file to SoundCloud.
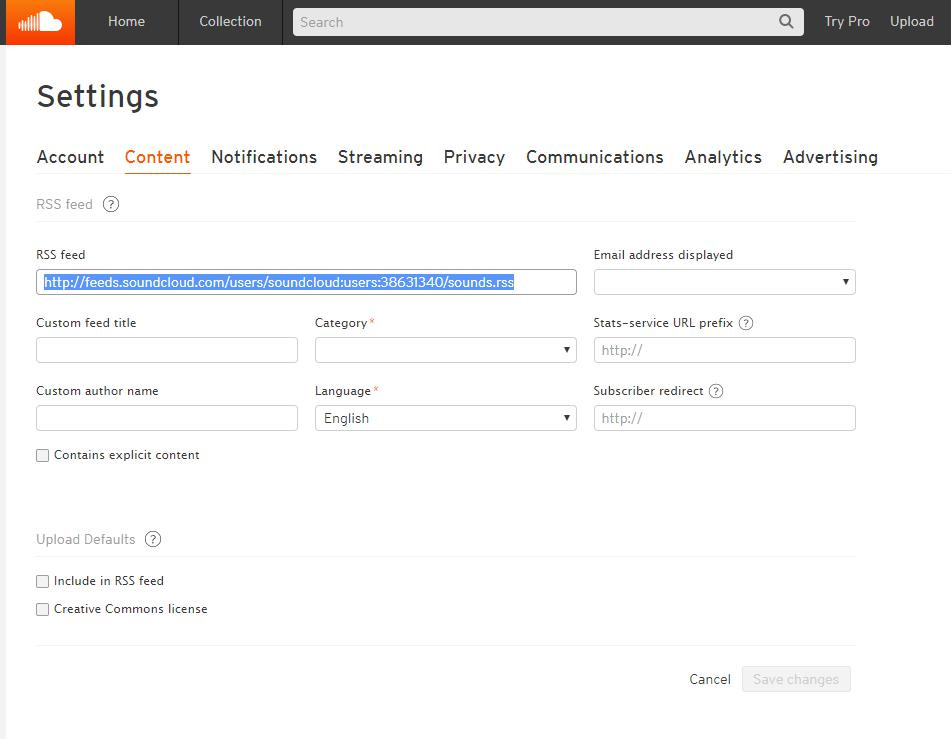
Once you’ve finished uploading your podcast MP3 file, you need to grab your RSS feed’s URL from your SoundCloud settings. Click on the three dots at the top right of the screen, select “Settings > Content” and copy the URL in the “RSS feed” field. This is what you’ll use to share your podcast on Apple Podcasts and Google Play. Head to “Publishing to iTunes and Google Play with your RSS Feed” section next.
Uploading Your Podcast to Anchor
An alternative to using SoundCloud as your podcast hosting platform is Anchor.fm. Anchor is a newer podcast platform that aims to make managing and distributing your podcast as simple as possible.
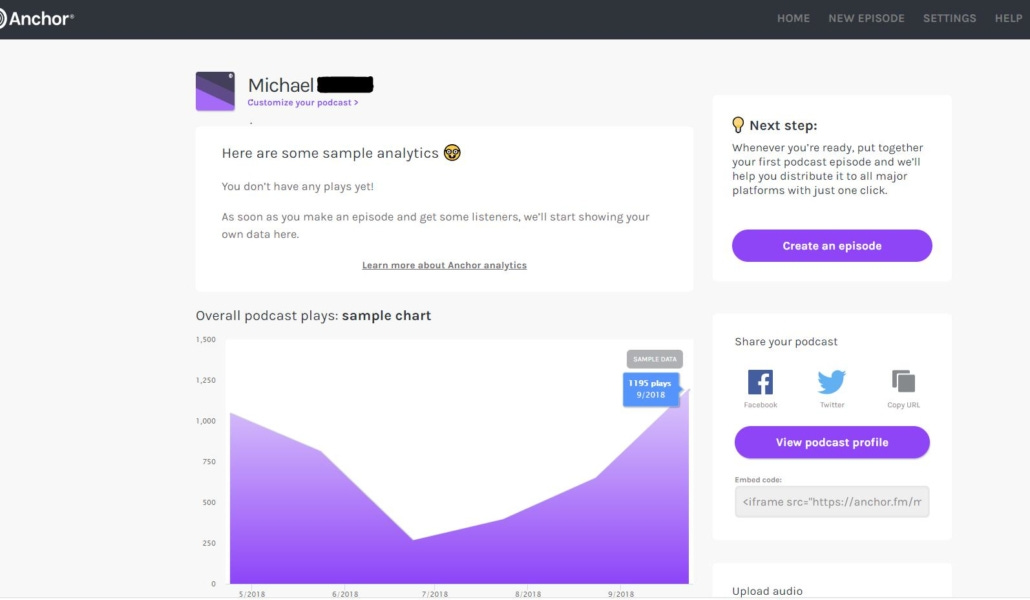
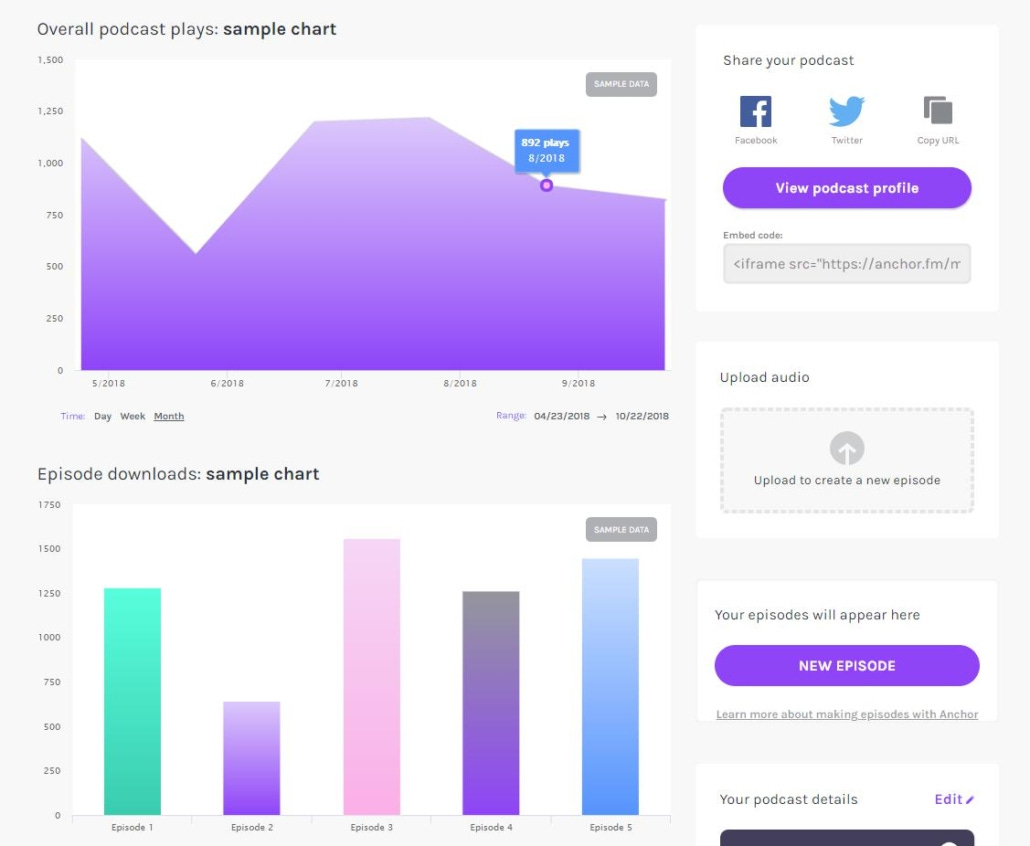
First, go to https://anchor.fm/ and sign up for a free account. Login and head to your dashboard, which should look something like this:
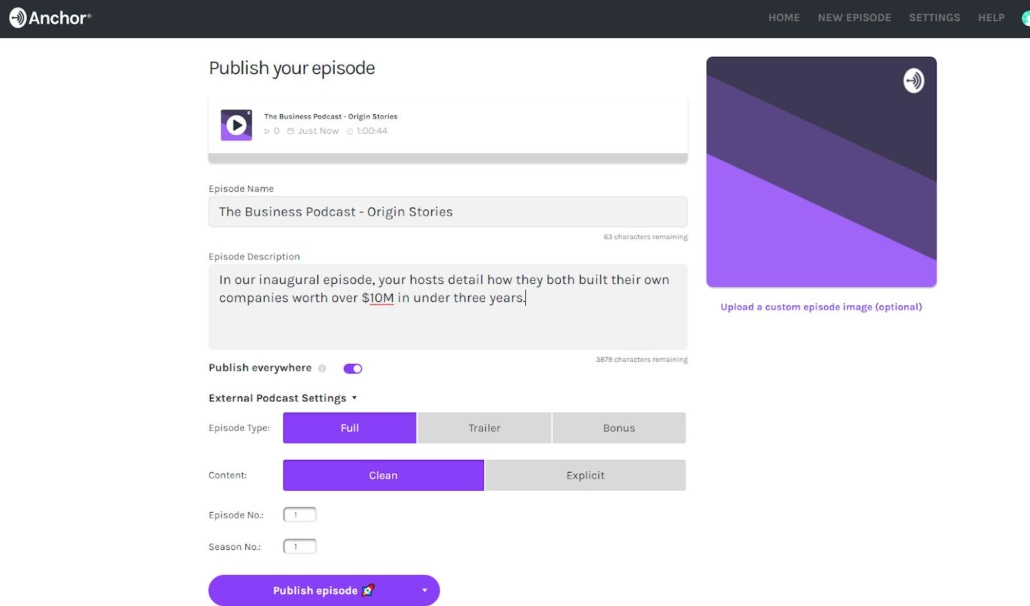
Since you already have your podcast audio, you can click on “Upload audio” on the bottom right and select your podcast MP3 file. Once the file is finished uploading, you can name your episode and provide a description.
Select “Publish Everywhere” to activate one of Anchor’s most useful tools – it will publish your podcast across the most popular podcast platforms like Apple Podcasts and Google Podcasts, with just one click. Compare that to SoundCloud and other hosts, where you have to submit your RSS feed manually for it to show up on these platforms
Expand the “External Podcast Settings” and fill out these settings. This allows platforms like Apple Podcasts to organize your podcast’s content for listeners. “Full” is a regular episode, while “Trailer” is a shorter episode to preview seasonal podcasts, and “Bonus” is bonus content episodes you don’t consider a regular installment of your podcast. Note whether your podcast’s content has explicit language or themes. Select your Episode and Season number – you’ll want to order these sequentially as you upload new episodes. Your first “Full” episode of your podcast will have a “1” in both fields.
Once you’re done, select “Publish episode”. You can also click to the arrow to the right and save the podcast as a draft episode or schedule it to publish at a later time.
Best Practices for Your Podcast’s Title, Description, and Tags
In the above steps, you had to decide on a title and episode description for your podcast. You also had to add tags that described your podcast on SoundCloud. These details are nearly universal when distributing a podcast, no matter which platform you use, and they’re incredibly important for people to find your show. That’s because these text elements are the first things your potential listeners will see before they decide to listen to your podcast. As such, you need to make sure your title, description, and episode tags are convey what your podcast is about.
Your titles should communicate the main idea of your episode. Don’t create extremely short or extremely long titles, but instead aim for about three to five words that summarize what the episode is about. Don’t try to be clever or use puns. Most likely listeners will be scrolling through your podcast feed on their listening app and considering which episode is most relevant to them, so be sure to keep this in mind while naming your episodes.
Once the listener has clicked on your episode, the episode description serves to clarify what topics and subtopics you’re covering. If you’ve had guests on your show, be sure to credit them and link to their online profiles. Add links to other content you’ve referenced in the show, and include your podcast’s social media channels so listeners can find you online.
Your podcast’s episode tags serve as keywords that listeners browsing for podcasts – on SoundCloud, Apple Podcasts, and other platforms – can find your show without knowing its name. For instance, if your business podcast is about best practices for bootstrapping a startup company, then you should include search-friendly keywords that describe this content like “startup” and “bootstrapping”. Ask yourself, “what terms would my ideal listener on be searching for on Google?” Those terms are often the exact keywords you should associate with your podcast episode, so long as they also match the actual content of your episode.
Publishing to iTunes and Google Play with your RSS Feed
To get your podcast onto Apple Podcasts, you need to submit your podcast’s RSS for verification. If you used Anchor for your podcast, you can skip this step – your podcast will already show up on these podcast platforms.
An RSS feed is a type of address that tells different services (like Apple Podcasts) where your podcast lives and provides other identifying information. It will look something like this:
https://yoursitename.com/path/podcast_rss.xml
To submit a podcast to Apple Podcasts, first head to Podcasts Connect: https://itunesconnect.apple.com/login?module=PodcastsConnect
If you use an Apple product, you already have an Apple ID and can sign in with that login. If you don’t want your podcast associated with that ID or don’t have one, sign up for a new ID at
https://appleid.apple.com/
From the “My Podcasts” tab in Podcasts Connect, click the large + in the top left hand corner.
Paste your RSS URL from Soundcloud and click Validate. Apple will notify you if there are any errors with the RSS feed’s information. It will prompt you to confirm your podcast’s artwork, title, description, and other information pulled from SoundCloud.
Once you hit Submit, it will take anywhere from a couple of hours to 3 days to validate your podcast. Once it’s validated, Apple Podcasts will populate your podcast’s page with any new episodes that are in the SoundCloud RSS feed.
To submit your podcast to Google Podcasts, first go to: https://play.google.com/music/podcasts/publish
Click “Get Started” and sign in with your Google account.
From the dashboard, click “Add a Podcast” at the top right. Agree to the Terms and Conditions and submit the RSS feed URL from SoundCloud.
Google with validate your RSS feed and verify your podcast. You will receive an email verifying that you control this RSS feed.
Back in Google Play, click “Publish Podcast” and wait for Google to approve your podcast (like Apple, this may take up to a couple of days). The feed will fill with any episodes you already have on SoundCloud.
Tracking Podcast Metrics
Most podcast creators want to know how many people have listened to their show. SoundCloud provides a basic count of how many people have engaged with your show on its platform, but if you want detailed listening metrics for your audiences on Apple Podcasts or Google Play, you’ll need to add a free metrics service.
To see how many listens your podcast has had on SoundCloud, click on your Account image and go to “Stats”.
This page lists “Plays” and “Downloads”, as well as other engagement metrics. “Plays” shows how many times people have hit the play button to listen to your show on SoundCloud, as well as how many listens your podcast has received through the RSS feed on other services like Apple or Google Podcasts. “Downloads” refers to how many people have downloaded your podcast’s audio file from your page (you need to have enabled downloads when uploading the file). “Likes”, “Comments”, and “Reposts” represent engagement with your podcast on the SoundCloud platform by other users. On the right, you can see a breakdown of listens by episode over the last seven days. You can adjust this to see data for other time ranges.
If you’re using Anchor, you can go to your Dashboard and see your podcast’s metrics in the center of your page.
Like SoundCloud, Anchor shows you your podcast’s listens over time across all platforms. It also breaks down your total listens by podcast episode.
If you want to use a third-party metrics service and integrate it with SoundCloud, Podtrac is the easiest and most popular option.
To sign up for Podtrac’s free measurement service, go to their signup page: http://analytics.podtrac.com/publisher-services
Create a free account with your name, contact info and email. Paste your RSS feed from SoundCloud into the field. Click on “Add Show” – you’ve created your Podtrac account. Now, you need to enable the Measurement Service. From the “Show Info” page, click on “Measurement Service” on the left-hand side.
Copy the following “Podcast Prefix”: http://dts.podtrac.com/redirect.mp3/
Go back to your SoundCloud Settings page with the RSS feed, and paste the above URL into the field called “Stats service URL prefix URL” on the right side. Hit “Save changes”.
All done! After a few days, your Podtrac Dashboard will record new download requests of your RSS feed across all platforms.
Fan Engagement and Promoting Your Podcast
Actively use social media and forums
To grow your podcast’s audience, you’ll need to market your show widely. The first step should be creating social media accounts for your podcast, a Twitter handle and a Facebook Page at the very least. You should publicize your podcast on these platforms each time you create a new episode, with a link to your SoundCloud or Anchor page, as well as posts with links to your Apple Podcasts or Google Podcasts page.
You should be taking active steps to get your podcast out there, especially in spaces that make sense for your show’s niche. Look for topic- or industry-specific forums on Reddit or Facebook Groups that overlap with the topics you cover on your show. On Twitter, find and interact with accounts of other podcasts in your field. Following and engaging with other podcast shows can also provide the opportunity to cross-promote shows. Also consider looking up experts in your field who you may want to reach out to for guest opportunities once you’ve established yourself.
No matter the platform, you must engage with others in a genuine way by posting and commenting. Only mention content from your podcast when it’s relevant to the topic at hand. It’s crucial that you don’t simply market your podcast at every opportunity. Create a podcast-dedicated account on these forums and become an active participant (on Facebook, you have to be associated with your personal account).
Create a trailer and engage with fans
Another marketing tactic is to create a short teaser episode for your podcast, which you then publish on your SoundCloud or Anchor feed. The purpose of this 1 to 3-minute episode is to explain to potential listeners why they should download your show and listen to it regularly. It should give insight into the range of topics you cover on your show, and how it’s different from other podcasts they may have heard. The trailer also provides you the chance to show that you’re an engaging host to listen to. Keep in mind that this teaser episode will be the main way that new listeners discover and try out your show before subscribing to your feed. This is especially true if your podcast episodes are longer and require a commitment of more than 30 minutes to finish.
As your audience begins to grow, start to think of unconventional ways you can create dedicated listeners who will evangelize for your show. This could be as simple as sending a thank-you tweet or email for their promoting your show on social media. Or it could be something as high-touch as asking if they’d like to talk to you on the phone for fifteen minutes.
Why have direct contact with your listeners? This strategy serves two purposes. First, it will cement the listener as a dedicated fan of your show – not many podcast hosts take time to talk to their listeners, especially as they get bigger. Second, learning why listeners tune into your show regularly, as well as what they don’t like as much, is valuable information for shaping your content moving forward. The more you know about your listeners, the more you can improve your content and gain more of them.
Next Steps for Your Podcast
And that’s the easiest way to podcast, period. There are other, more complex ways that offer other benefits, but the important thing is that you create your show, record it, and get it out into the world. Everything else can come later.
As you build your catalogue of episodes and attract new listeners, be sure that you’re continuously improving your process. You can start by checking out these other podcast guides below:


